Define Site Layers Dialog Box
Prerequisites for use: An Atlas map is the active![]() The application, window, tab, or other screen element which is currently being used; sometimes called the "front" or "frontmost" screen element tab.
The application, window, tab, or other screen element which is currently being used; sometimes called the "front" or "frontmost" screen element tab.
Use: This dialog box is used to modify pre-defined Site layers. This is done by picking sites based on various criteria, and setting display characteristics for these sites. You can create a new layer which can be displayed in any Atlas tab, or modify an existing layer.
Description: This dialog box has two appearances, providing basic and advanced options. Click Advanced at the bottom of the Define Site Layers dialog box to view the Advanced options.


Open the Define Site Layers Dialog BoxOpen the Define Site Layers Dialog Box
- Open a map and make it the active tab.
- From the Site Layers pop-up menu, choose Define Site Layers. The Define Site Layers dialog box opens.
Define a New Site Layer (Overview)Define a New Site Layer (Overview)
- Open the Define Site Layers dialog box.
- Click New to create a new layer. [New name] is added to the List of Site Layers and the Name box.
- Enter a name for the new layer in the Name box.
- Choose how the site labels are to appear on the layer in the Label details area.
- Select the desired options to define the sites to be displayed on this layer.
The new layer starts with all Importance items selected, but no periods. - Click OK. If a Atlas tab is the active tab, the new layer is displayed on the map.
Basic Options: Define Site Layers Dialog BoxBasic Options: Define Site Layers Dialog Box
List of Site Layers (Top Left): Displays any layers already defined and available via the Site Layers pop-up menu. The layer last used when this dialog box was closed is selected when the dialog box is reopened. Click a layer name to display its current settings in the dialog box.
List Buttons: Used to arrange the layer names in the list and on the pop-up menu.
- New: Adds [New name] to the list and in the Name box, and resets the rest of the options to the default settings.
- Delete: Removes the selected name and definition from the list and from the Site Layers pop-up menu.
- Up and Down Buttons: Click to move the selected name up or down the list.
Name Box: Used to enter or modify the name of the selected layer. Adding spaces before the name indents it on the pop-up menu.
Label details Area: Options in this area set the display of ALL sites in the layer.
- Font, Color, Sample Pop-up Menus: Offer standard options for choosing a font and text color. The Sample area displays the currently selected style.
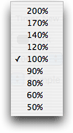 Scale Pop-up Menu: Sets the sizes of sites in this layer relative to other layers. Within a layer the label size varies with the importance of the sites and the magnification of the map. Available options range from 50% to 200%.
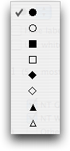 Marker Pop-Up Menu: Used to choose the shape of site markers.
- Hide label names: When selected, displays only the markers with no site labels. This option is particularly useful for teaching and testing.
- Use white background: When selected, may improve the contrast of the label with the background.
Select sites Area: Options in this area set which sites to include in the layer.
- Sites with importance of: Used to choose the level of significance (combined Biblical, historical and archaeological criteria); 1 is least significant and 5 is most important. At least one item must be selected. Only sites with the selected levels of importance are included in the layer.
- Biblical periods: Contains options for twelve historical periods. Most of these ranges define "Biblical periods" with a name and the range of books in parentheses.
- By default, when an item is selected, any site occurring in that period is included in the layer. At least one period box must be selected to define the layer.
- Example: If you choose Importance of 3, 4, and 5, and the periods The Land and History, the layer displays all sites mentioned anywhere in Joshua through Chronicles if they are of medium to major importance. If all Importance items are selected, as well as the Poetry period, the layer displays all sites mentioned in Job, Psalms, Proverbs, or the Song of Solomon.
- Check All: Click to choose all the Biblical period items; you can then uncheck the items you do not want.
Advanced Options: Define Site Layers Dialog BoxAdvanced Options: Define Site Layers Dialog Box
The Advanced options include items that affect display of the Biblical periods and displays new items for choosing Archeological periods. Any items set in the Advanced area of the Define Site Layers dialog box remain in effect for that layer even when the options are hidden.
When you create a new layer, no Archaeological periods are checked. By default, Any checked period is chosen in the Biblical and Archaeological periods dialog box and Either group is chosen for the Show sites in setting.

Archaeological periods Area: Displays 12 items for the Archaeological periods covering the Biblical writings. Choose the desired items to define sites according to Archaeological criteria.
- Check All: Click to choose all the Archeological period items; you can then uncheck the items you do not want.
- Show sites in (Biblical periods and Archeological periods): For both periods, choose either Any checked period or All checked periods.
- Any checked periods: When selected, displays any sites that occur in any of the checked periods.
- All checked periods: When selected, displays only sites that occur in all selected periods.
- Examples
- If Patriarchs, Land, and Monarchy are selected, choose Any checked periods to display sites which occur in any one or more of those periods.
- Choose All checked periods to display only sites occurring in all three periods.
- If all items are selected for a period and you choose All checked periods, only those sites which occur in every period are displayed.
Show sites in: These options (Either group or Both groups) are used to combine the Biblical and Archeological periods in the same way.
Example: Select Patriarchs for the Biblical period and Prehistoric for the Archeological period.
- If Either group is chosen, the new layer displays sites mentioned in Genesis OR occupied in the Chalcolithic period.
- If Both groups is chosen, the new layer displays only sites occupied in the Chalcolithic period AND mentioned in Genesis.
Basic: Restores the Define Site Layers dialog box to display of the basic options.